As the sun sets on another day in the bustling city of Bangalore, the team at Idyl, a one-stop shop for all your gardening needs, is hard at work, helping green-thumbed enthusiasts breathe new life into their beloved clay pot planters. In this comprehensive guide, we'll walk you through the process of repairing and refinishing those weathered, time-worn pots, so you can enjoy their timeless charm for years to come.
Assessing the Damage
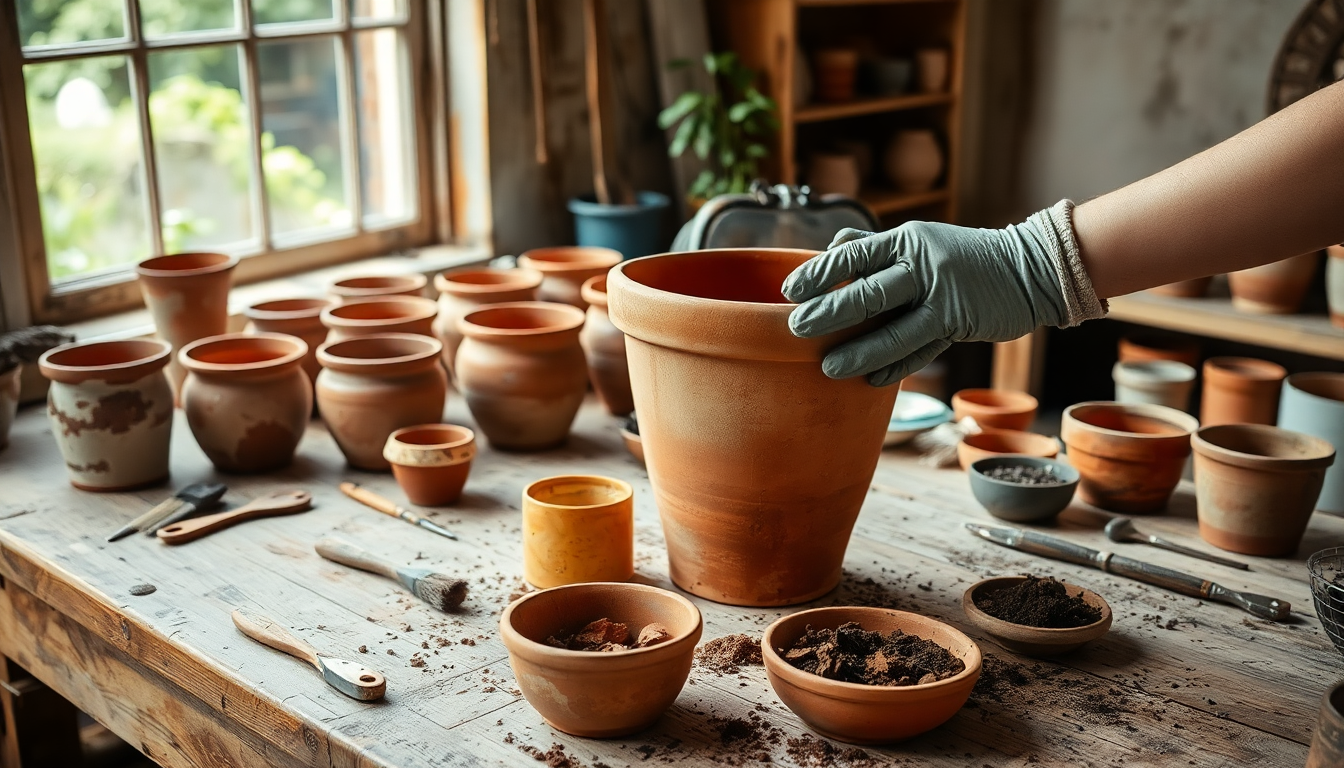
The first step in reviving an old clay pot is to carefully inspect it for any cracks, chips, or signs of wear and tear. Look for areas where the glaze may have worn off, exposing the porous clay beneath. Pay close attention to the base and the rim, as these are the most vulnerable parts of the pot.
Identifying the Problem
Once you've identified the areas that need attention, it's time to determine the extent of the damage. Small cracks or chips can often be repaired with a specialized clay pot adhesive or epoxy, while more significant damage may require a more comprehensive approach.
Cleaning and Preparing the Pot
Before you can begin the repair process, it's essential to thoroughly clean the pot. Start by removing any dirt, debris, or dried-up soil using a stiff-bristled brush and warm water. Be gentle, as you don't want to further damage the pot.
Removing Old Sealants or Coatings
If the pot has been previously sealed or coated with a protective layer, you'll need to remove it before proceeding. This can be done using a chemical stripper or by gently sanding the surface.
Repairing Cracks and Chips
For small cracks and chips, you can use a specialized clay pot adhesive or epoxy to fill in the gaps. Make sure to follow the manufacturer's instructions carefully, and be sure to smooth the surface once the adhesive has dried.
Larger Repairs
If the pot has more significant damage, such as large cracks or missing pieces, you may need to use a more extensive repair method. This could involve using a clay-based filler or even creating a custom mold to replace missing sections.
Refinishing the Pot
Once the repairs have been made, it's time to refinish the pot. This can be done by applying a new layer of glaze or by painting the pot with a high-quality, outdoor-safe paint.
Choosing the Right Finish
When selecting a finish, consider the overall aesthetic you're going for. A natural, matte finish can give the pot a rustic, earthy look, while a glossy glaze can add a touch of elegance.
Protecting Your Investment
To ensure your revived clay pot planter lasts for years to come, it's important to properly care for it. This includes regularly cleaning the pot, protecting it from the elements, and using the right soil and plants.
Proper Pot Maintenance
Regularly cleaning the pot with a soft-bristled brush and warm water can help prevent the buildup of dirt and debris. Additionally, you may want to consider applying a sealant or protective coating to the pot to help it withstand the elements.
Conclusion
Reviving an old clay pot planter can be a rewarding and satisfying project. By following the steps outlined in this guide, you can breathe new life into your cherished garden accessories and enjoy their timeless beauty for years to come. Remember, the team at Idyl is always here to provide expert advice and high-quality gardening supplies to support your restoration efforts.
Happy gardening!
0 comments