As a passionate gardener, I'm always on the lookout for ways to make my outdoor space more sustainable and eco-friendly. One of my recent discoveries has been the incredible versatility of clay pot shards - those broken pieces that often end up in the trash can. Instead of discarding them, I've learned how to transform them into a beautiful and functional garden mulch that not only enhances the visual appeal of my beds but also provides numerous benefits for the soil and plants.
In this comprehensive blog post, I'll share my step-by-step guide on how to upcycle your clay pot shards into a stunning garden mulch. Whether you're a seasoned gardener or just starting out, this DIY project is a fantastic way to reduce waste, save money, and create a truly unique and personalized touch to your outdoor oasis.
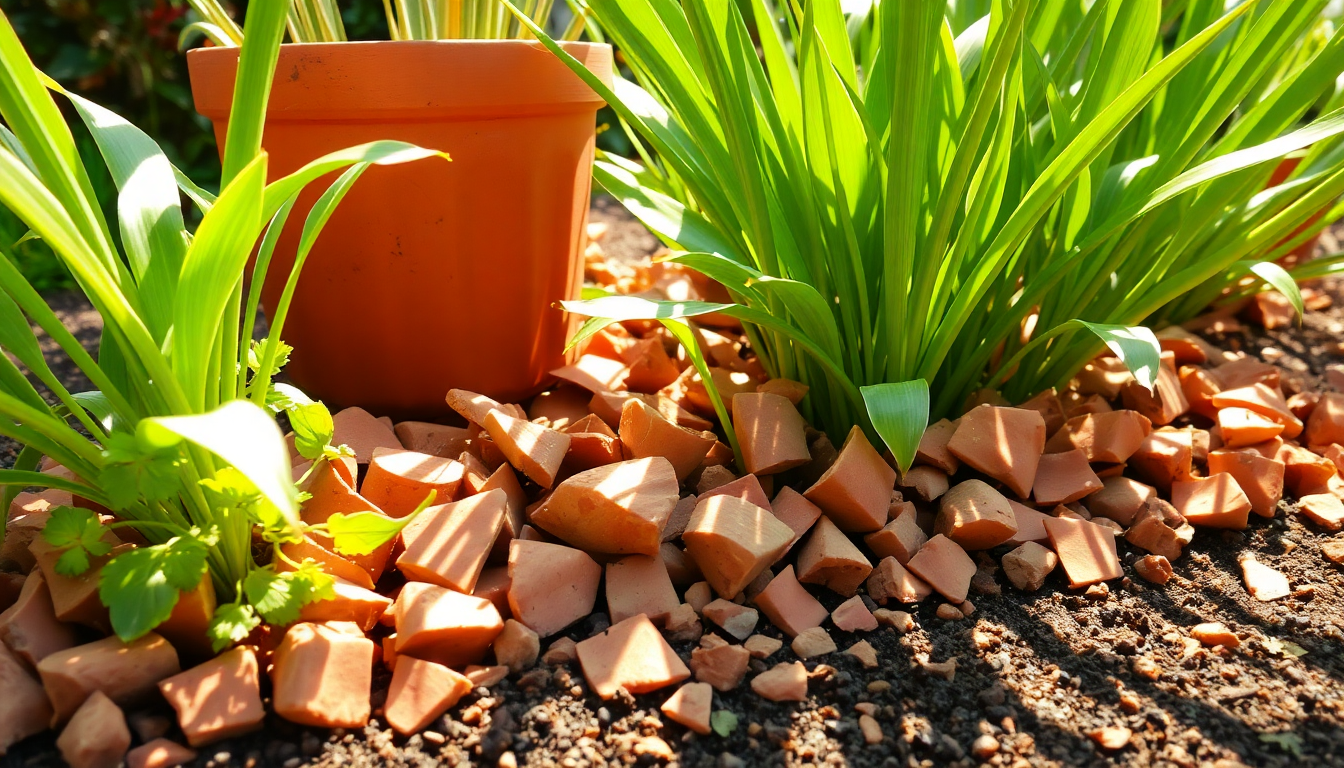
The Benefits of Clay Pot Mulch
Before we dive into the how-to, let's explore the many advantages of using clay pot shards as a garden mulch:
Improved Soil Drainage and Aeration
Clay is a naturally porous material, which means that when used as a mulch, it helps to improve soil drainage and aeration. This is particularly beneficial for plants that prefer well-draining soil, as it prevents waterlogging and promotes healthy root growth.
Enhanced Moisture Retention
While clay is porous, it also has the ability to absorb and retain moisture. This can be a game-changer for gardeners in hot, dry climates, as the clay mulch helps to keep the soil moist for longer, reducing the need for frequent watering.
Weed Suppression
The physical barrier created by the clay pot shards helps to block sunlight and prevent weed seeds from germinating. This can significantly reduce the amount of time and effort required for weeding, allowing you to focus on other gardening tasks.
Aesthetic Appeal
One of the most appealing aspects of using clay pot shards as a mulch is the unique and visually striking appearance it creates. The varied shapes, sizes, and colors of the shards can add depth, texture, and a touch of rustic charm to your garden beds.
Durability and Longevity
Unlike organic mulches that break down over time, clay pot shards are incredibly durable and can last for years in your garden. This makes them a cost-effective and low-maintenance option for gardeners who want to invest in a long-lasting solution.
Gathering and Preparing Your Clay Pot Shards
The first step in creating your clay pot mulch is to gather the necessary materials. Start by collecting any broken clay pots, planters, or other ceramic garden decor that you have on hand. If you don't have enough of your own, consider reaching out to local nurseries, garden centers, or even neighbors who may be willing to share their unwanted pot shards.
Once you have your collection, it's time to prepare the shards for use. Begin by sorting them into different size categories, as this will help you create a more visually appealing and functional mulch. Aim for a mix of larger, more substantial pieces as well as smaller, finer fragments.
Next, give the shards a thorough cleaning. Rinse them under running water to remove any dirt, debris, or residual potting soil. This will help ensure that your mulch is free of any unwanted contaminants that could potentially harm your plants.
Finally, let the shards air-dry completely before moving on to the next step. This will prevent any excess moisture from being introduced into your garden beds.
Crafting Your Clay Pot Mulch
With your clean, dry clay pot shards ready to go, it's time to start creating your custom garden mulch. Here's how to do it:
Step 1: Spread a Base Layer
Begin by spreading a 2-3 inch layer of the larger, more substantial clay pot shards over the soil in your garden beds. This base layer will help to improve drainage and create a sturdy foundation for the rest of the mulch.
Step 2: Add the Finer Fragments
Once the base layer is in place, sprinkle the smaller, finer clay pot shards over the top. This will help to fill in any gaps and create a more cohesive, visually appealing mulch.
Step 3: Smooth and Compact
Using a garden rake or your hands, gently smooth and compact the clay pot mulch to create a uniform, level surface. This will help to prevent the shards from shifting or becoming uneven over time.
Step 4: Incorporate Organic Matter (Optional)
If desired, you can also mix in a small amount of organic matter, such as compost or well-rotted leaf litter, to further enhance the soil's fertility and moisture-holding capacity.
Step 5: Maintain and Replenish
As the months and years pass, you may need to occasionally top up your clay pot mulch, especially in high-traffic areas or where the shards have become displaced. Simply add more of the larger and smaller fragments as needed to maintain an even, attractive layer.
Customizing Your Clay Pot Mulch
One of the best things about using clay pot shards as a garden mulch is the ability to customize it to suit your personal style and the unique needs of your outdoor space. Here are a few ideas to get you started:
Color Coordination
If you have a specific color scheme in mind for your garden, you can sort your clay pot shards accordingly and create a visually cohesive mulch. For example, you might use a mix of terracotta, white, and blue-hued shards to complement a Mediterranean-inspired planting palette.
Themed Designs
Get creative and use your clay pot mulch to create unique, themed designs in your garden beds. You could arrange the shards in a mosaic pattern, spell out a word or phrase, or even incorporate them into a larger sculptural element.
Textural Contrast
By mixing different sizes and shapes of clay pot shards, you can create a mulch that adds depth, dimension, and visual interest to your garden. The contrast between the larger, more substantial pieces and the finer fragments can be truly stunning.
Caring for Your Clay Pot Mulch
Maintaining your clay pot mulch is relatively straightforward, but there are a few key things to keep in mind:
Weed Management
While the mulch itself helps to suppress weed growth, you may still need to occasionally pull any stubborn weeds that manage to poke through. Be gentle when doing so to avoid disturbing the clay pot shards.
Replenishment
As mentioned earlier, you may need to top up your mulch over time, especially in high-traffic areas or where the shards have become displaced. Keep an eye on the depth of the mulch and add more as needed to maintain an even, consistent layer.
Moisture Monitoring
One of the benefits of clay pot mulch is its ability to retain moisture, but you'll still need to monitor the soil's moisture levels and adjust your watering schedule accordingly. Avoid letting the mulch become too dry, as this can lead to water-repellent soil.
Seasonal Adjustments
Depending on your climate, you may need to make some seasonal adjustments to your clay pot mulch. In colder regions, for example, you may want to consider adding a layer of organic mulch over the top to provide additional insulation for your plants' roots.
By following these simple care tips, you can ensure that your clay pot mulch continues to thrive and provide long-lasting benefits to your garden.
Conclusion
Transforming your clay pot shards into a beautiful and functional garden mulch is a fantastic way to upcycle waste, save money, and create a truly unique and personalized touch to your outdoor space. With its numerous benefits for soil health, moisture retention, and weed suppression, this DIY project is a must-try for any eco-conscious gardener.
So, what are you waiting for? Start collecting those clay pot shards and get ready to transform your garden into a sustainable, visually stunning oasis. Happy gardening!
0 comments